Wednesday 24 September 2014

Baked Tiramisu Cheesecake recipe.

Hi there foodie fam!

Welcome back to my recipe blog.

This weeks recipe is for a baked cheesecake based on one of my favourite puddings, tiramisu.

Tiramisu is a similar pud to our own English sherry trifle but instead of sherry soaked cake, fruit ( jelly or compote) a layer of custard, then cream topping it is made with, arguably, slightly more sophisticated ingredients like espresso coffee, brandy, ricotta or mascarpone and "lady finger" biscuits. It's very rich and usually quite boozy and is a perfect  way to finish off a good Italian meal.

To turn this classic Italian pud into a baked cheesecake is really easy to do. In fact you can pretty much make a baked cheesecake out of lots of things you may never had thought of. I myself make a fantastic rose scented Turkish delight cheesecake using the standard ingredients for baking a cheesecake, that is, biscuits for the base and cream cheese, ricotta or mascarpone mixed with eggs, sugar and a little flour for the topping,  but adding rose water and chunks of Turkish delight to the mix before baking. Or, as those of you who know me will confirm, even chocolate and beetroot baked cheesecake! ( one of the dishes I did on Masterchef.) which actually worked pretty well.

 By the way, as I have a new laptop and have dug out my Masterchef DVD I am going to be putting up an edited video of my time on the show in a few weeks, so look out for that!

Anyway, back to the recipe, and I'd like to give you a few little hints to get the best results.

Firstly, if you can, please use freshly brewed coffee. If you have a cafetiere or one of those little metal coffee pots you put on the stove then make your coffee for this recipe in that. A lot of recipes on the Internet will tell you to use instant coffee granules and while this is okay, I think it makes the finished cake a little bitter. As a rule of thumb I would say that if you normally drink instant coffee then it'll be fine but if you like the taste of fresh brewed coffee put that in instead. Whichever coffee you use though, make sure it's very strong. You want the taste of the coffee to be the most dominant flavour in the finished pud.

Secondly, you can use any type of soft cream cheese for the topping. I have used 2x250g tubs of supermarket own brand cream cheese and one 250g tub of ricotta. This is mainly to keep costs down but if you'd like to use all ricotta or all mascarpone then go ahead!

Thirdly, unless you are a brandy connoisseur and can tell your XO from your cheapo, then I would use the cheapest brandy you can get. Make sure it is actually proper brandy though as I've seen something called "BRANDX" (crafty, eh? ) which is only about 20% proof and tastes horrible! Also if you like a really boozy pud then you can add a bit more brandy to the mix. Don't overdo it though as too much will stop the topping from setting properly and may even cause the mixture to split.

Finally, when you bake your cheesecake it should still have a little wobble to it if you give it a gentle shake. As it cools the topping will carry on cooking and will set perfectly. if you over bake it the topping will end up being a little "chalky" and you don't want that after your hard work, now do you?

Okay then, enough small talk, lets get to this weeks recipe!

Baked Tiramisu Cheesecake Recipe ( makes about 10 good portions. )


Equipment:

Large mixing bowl.

Balloon whisk.

10 inch springform cake tin.

greaseproof paper.

Rolling pin.

Zip lock freezer bag.

Small plastic microwave-able tub.

Metal tablespoon.

Ingredients:

225g of  dark chocolate digestive biscuits.

60g of  melted butter plus a little extra for greasing the cake tin.

1 shot of very strong espresso coffee, or 1 tablespoon of instant coffee granules made up with about 50ml of boiling water.

50ml of brandy.

500g of cream cheese.

250g of ricotta cheese.

125g of caster sugar.

25g of plain flour.

100g of good quality 70% cocoa chocolate, broken into pieces.

3 medium eggs.

1 medium egg yolk.

Method:

pre-heat your oven to 180 degrees c/ gas mark 4.

Put the biscuits into the zip lock bag, squash out the air and seal up.

Roll the rolling pin over the bag to crush the biscuits. ( I don't crush them too much as I like a little bit of variety in texture but you can crush them completely if you prefer.)


 Line the cake tin with greaseproof paper and rub all over with a little butter. Trim off the excess greaseproof with a knife or pair of scissors.


 Pour the crushed biscuits into a mixing bowl and add the melted butter. Mix together thoroughly then put the mix into the bottom of the cake tin and press down with the back of a spoon to form the base.

Try to keep the biscuit mix as even as possible over the bottom of the tin. Smooth over with the spoon.

Put the cake tin with the biscuit base in the oven for about 5 minutes then remove and either chill in the fridge, or, even better,  pop it in the freezer whilst you make the filling.


 Put the ricotta, the cream cheese and the sugar in the mixing bowl and cream together with a spoon. Then add the flour and beat the mix until smooth.


 In a separate bowl, beat the eggs and egg yolk together and then stir into the beaten cheese and sugar. Once combined give them a bit of a whisk to make sure there's no streaks of egg through the mix.

 When the eggs and cheese are mixed add the coffee and, once again, stir in then whisk.

 Add the brandy and mix in thoroughly.


Remove the cake tin from the fridge or freezer and pour on half of the filling.


Now, melt the chocolate in the small plastic tub in the microwave, on defrost, until its just melted. This should take about 2 minutes.


Pour the melted chocolate all over the bottom half of the filling in the cake tin. You can either gently swirl it about with a spoon to get a marbled effect or you can leave it as it is.


Pour on the remaining filling. If some of the chocolate comes to the top then you can have a mess about with the back of a spoon to get a nice streaked effect. Try and remove any chocolate that has crept to the edge of the tin as it will burn and taste bitter when the cheesecake is baked.


Put the cheesecake in the bottom of the oven. As you can see I use an oven thermometer to make sure the temperature is right. I've also put an oven shelf above the cheesecake so that if it starts to brown too much I can put a baking sheet on the shelf to prevent the top burning.


Bake for about 50 minutes. There should still be a little wobble to it when it's done. Don't worry too much about the top being a little dark, it's not burnt, it's just where the chocolate has come to the surface.

When you are satisfied it is done turn off the oven and open the door but leave the cheesecake in there to cool slowly, as this will prevent the top from cracking too much.

Leave it like this in the oven for about 30 minutes, then remove from the oven and run a knife around the edge of the tin to release your tiramisu cheesecake. Allow to cool on your work surface for about another 30 minutes, then cover with cling film or foil and chill in the fridge until you are ready to serve.


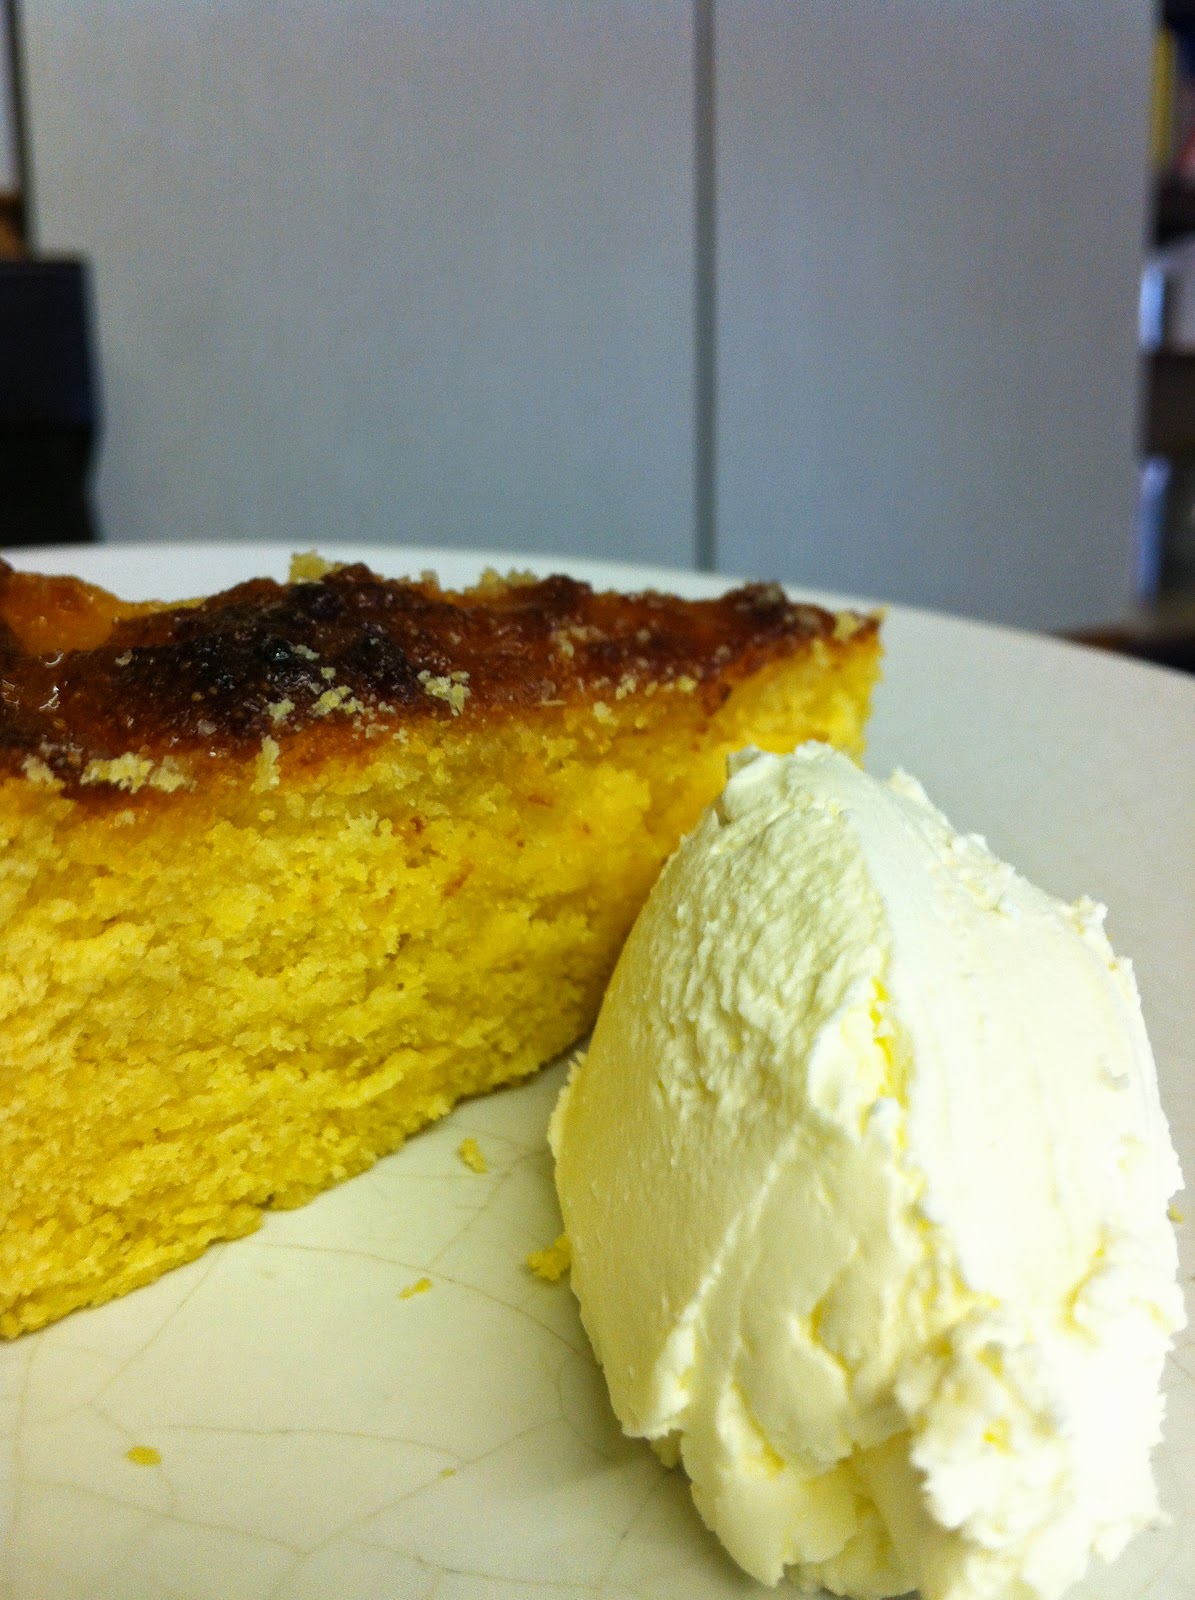
To serve you can dust the top with a little icing sugar mixed with cocoa powder and perhaps a lick of double cream. This cake is perfect as an afternoon treat with a cup of fresh coffee.

Hope you enjoyed this weeks recipe!
As it's getting a little cooler outside and Autumn is well and truly upon us my next recipe blog is going to be for a good old hearty British family staple, shepherd pie. I don't know if I'm going to have time to do it this weekend as essential maintenance is required on my scooter but I'll try to fit it in if I can.

Until next time then blog buddies,

Happy cooking!


Mat.


Wednesday 17 September 2014

Polish Pierogi Recipe.

Welcome Back Blog Buddies!

For this weeks recipe I was given a bit of a challenge by one of the blokes I work with to make pierogi. His name is Jacek (Polish Jack, as he's known.) and he has lived over here for a few years. His English isn't the best, as you'd expect, so I asked him if he could give me a proper Polish recipe for pierogi so that I could make them as authentic as possible. I thought he might bring in a dog eared book, handwritten by his mother in Polish and we would have to decipher the ingredients, measurements and method together before I could get started but, the day after asking me, he brought in a print out of a recipe he got off google that he had translated into broken English. He did assure me that it was a genuine Polish recipe.

Pierogi, for those that don't know, are fried stuffed dumplings, they're a little bit like Italian ravioli, but a bit more robust and fried till crispy and they are probably the most well known Polish dish. There are lots of different fillings for them but the most common is fermented cabbage ( like German sauerkraut) and mushroom, and , as this was the recipe that Jack had given me, I thought that's the one I'd make.
Now, a few years ago at the Bank Bar we did a "new European" night where we had dishes from Poland, Hungary and other new additions to the European union, and one of the starters on that menu were pierogi. I must have had a look at a few recipes back then and thought they didn't sound very good, so made my own up of ground Polish sausage, sauerkraut and onion with lots of herbs and spices in. I was quite pleased with the results as were the diners on that night but I was aware that it wasn't really the genuine article so I was more than happy to take up Jack's challenge and make them to his recipe exactly.

To be absolutely honest I wasn't that impressed with the results. The actual pierogi turned out fine, nice and crispy on the outside, still a bit chewy inside but the filling, to me, needed something else. some garlic, or some sort of ground meat and a few herbs or, to keep it veggie, a good strong cheese.

So, what I've done is give you the basic recipe , as printed off for me by Jack, below but feel free to add other ingredients to it. The method for making them is a little fiddly and takes a while so It's a shame they didn't deliver on the flavour front. Just be aware that the filling has to be of a fairly dry consistency so that the pierogi don't explode!

By the way, Jack absolutely loved them! he said he hadn't had pierogi that good since he left Poland!


Cabbage and Mushroom Pierogi Recipe. ( makes about 30 pierogi.)

Equipment:

Frying pan.

Food processor.

Large mixing bowl.

Measuring jug.

Rolling pin.

Pastry cutter or chefs ring approx 2 3/4 inch or 7cm diameter.

Large saucepan.

Slotted spoon.

Wire cake rack.

Box grater.


Ingredients:

Approx 400g of plain flour.

50 g of softened butter.

1 whole egg.

2 egg yolks.

175ml of lukewarm water.

25g pack of dried wild mushrooms.

450g of Polish fermented cabbage (you can find this in the Polish section of most large supermarkets.)

200g fresh mushrooms.

1 large onion.

1 large carrot.

3 bay leaves.

5 allspice (pimento) berries.

salt and pepper.

vegetable oil, for frying.

Method:

First of all, make the filling.

Finely dice the onion and allow to sweat down,with a splash of oil on a low to medium heat in the frying pan for around 20 minutes. stir occasionally to prevent the onions from browning.


While the onions are sweating put half of the jar of cabbage into the large saucepan along with the bay leaves and the allspice berries. Cover with cold water and bring steadily to a boil, reduce the heat and simmer on a very low heat for around 1 hour.


Put the dried mushrooms in a measuring jug and cover with boiling water to re-hydrate for around 30 minutes.


Once the onions have sweated down , peel the carrot and grate into the frying pan with the onions, cook for about 10 minutes.


Chop the fresh mushrooms as finely as you can, then add them to the frying pan. Turn the heat up a little and cook for about 15 minutes.


 Remove the re-hydrated wild mushrooms from the measuring jug and give them a good squeeze to get rid of any excess water. Finely chop and add these too to the frying pan.


Let the mushroom-onion-carrot mixture cook down until it is a dry consistency. Season well with salt and pepper then blitz up in the food processor to as smooth as you can. return to the frying pan and leave over a low heat whilst you drain the cabbage.

Add the cabbage to the frying pan and mix thoroughly with the mushroom mixture.

Check the seasoning and leave aside to cool.


Pierogi dough method:


Put the flour and a pinch of salt in the large mixing bowl and make a well in the centre.

Crack the eggs into the well and, with a fork whisk the eggs so that they gradually incorporate the flour.


Keep whisking with the fork until you have a sticky dough.

Add the softened butter and mix into the dough. Don't worry too much about the dough being a bit lumpy as you are going to knead the lumps out.


When the dough is thoroughly mixed, go in with your hands. At first the dough will stick to your hands so have some extra flour ready to add to it a little at a time until the dough starts to behave. (this should take about 10 minutes.)

Once the dough is a bit more solid, and your hands are clean, turn it out onto a well floured work surface or pastry board.

Knead the dough firmly for a good 10 minutes until it is soft and flexible. you will need to re-flour the work surface a few times to prevent it sticking.


When the dough is soft and flexible, put it back in the mixing bowl, cover with clingfilm and pop into the fridge to rest for about 30 minutes.

After resting the dough, turn back out onto your floured work surface and cut in half. Knead one half  briefly and then roll out to about 3mm thick. Cut out as many rounds as you can with the pastry cutter or chefs ring, gather up the remaining dough and add it to the other half, then repeat the process until you have used up all the dough.


Hold a round of dough in your hand and put a teaspoon full of the cooled mushroom cabbage mixture in the centre. With your finger, lightly dampen the edge of the dough with a little water and close the dough over the filling. You can do this on the work surface if you find it easier, as in the pictures. I started doing it this way then realised it was much easier to do it in my hand unfortunately, i couldn't take a photo of this as both my hands were busy doing something!


 Press the dough together to form a half moon shape, making sure none of the filling is sticking out.


Then crimp the edges together using a fork.
Put them on a floured baking sheet as you do them so they don't stick to the work surface.

Repeat this process until all of the dough rounds are used up. it's a bit fiddly at first but I soon got into it and was turning them out at a rate of about one every thirty seconds towards the end.

Now bring a large saucepan of salted water to a fast rolling boil and drop a batch of the pierogi in, about 8 at a time. As soon as they start to float, which should only be about 3 minutes, fish them out with a slotted spoon and put them on a wire cake rack to dry a little.
Once all of the pierogi have been softened in the boiling water you can finish them off in a frying pan.


Heat about half an inch of oil in the frying pan and add the pierogi carefully, about 6-8 at a time. fry on one side for about 3 minutes then turn them over and fry on the other side. They should look nice and brown and be crispy and bubbly on the outside.


Put the pierogi on a tea towel or some kitchen roll to remove the excess oil and they're ready to go!

They are usually served with a chive sauce, which you can make using a bechemel and adding chopped chives but, as I was running out of time, I made a really simple sauce of natural yogurt, salt and pepper and chopped chives which works really well with them.
There you have it then, challenge accepted and completed!

I'd love to try these with maybe some of my mate Andy low n' slow's pulled pork. In fact I did actually braise a rabbit down with a view to making some rabbit pierogi but didn't get chance to do any. Maybe I'll try some different fillings in the future.

OK then foodie folks, another recipe done! Next weeks recipe is going to be a dessert of some kind, something I've made lots of times before, so please look out for it!

Until then,

Happy cooking!


Mat.


Monday 8 September 2014

Gluten Free Lemon Drizzle Pollenta Cake!


Hey there food fans!

Welcome back to my recipe blog.

It's been another couple of weeks of food related shenanigans for me. The bank holiday weekend started with a bang on Friday as, once again I was helping out "doctor of meat" Andy Stubbs with his stall at the Digbeth Dining Club's second birthday bash. It was a brilliant event with around 12 traders selling their delicious wares to around 3000 hungry punters. The weather stayed fine, every stall was busy all night and a good time was had by all!

Then, on the Saturday it was a train journey for me and my bro, Sandy, to London to meet up with my crazy cousin Rebecca who lives on an old abandoned factory site with around 300 other artists, designers, actors, illustrators and other creative types in Haringey. It's somewhere in London I had never been before but I was pleased and astounded with an entire road ( Green Lanes ) choc full of Turkish deli's, bakeries, shops and restaurants. We ate at a very reasonable place called Devran.
There is a truly authentic menu of Turkish dishes on offer, I can't say it's the best Turkish restaurant I've ever eaten in because it's the first one I've ever eaten in but the food was fantastic. We had a mixed vegetarian Meze to start between us with some of the best pitta bread I've tried, I followed this with a gorgeous slow cooked lamb Kleftico which was also delicious. The total price for 3 of us including a couple of Turkish beers each for Sandy and me and two glasses of wine for Rebecca was £74 which, by London standards is a steal! I would highly recommend, if you are in that part of London, going and giving one of the many restaurants a try, you won't regret it!
On the Sunday it was on the tube for us across London to Notting Hill for Carnival. I hadn't been for about 8 years and Sandy had never been before and I have to say we had a magnificent day of drinking rum cocktails ( one my cousin and me had made up many years before consisting of a young "jelly" coconut, plenty of Cockspurs rum, ginger beer and lime.) filling we belly of good honest Caribbean street food and dancing on street corners to the most intense and earth shaking dub music at "University of Dub". A totally excellent family day out!

Sandy and me went to do a little bit of shopping in the deli's and bakeries on Green Lanes on the Bank holiday Monday ( Sandy bought some squid jerky!) then it was the train home to rainy old Cannock.

So, as you can imagine, it took a couple of days to recover from the weekend and I was keen to get something cooked and blogged for you over the weekend just gone. My original idea, with the weather turning from sunny to somewhat cooler, was to do a sticky toffee pudding for you but, after listening to Lily Allen being interviewed on the radio and mentioning a lemon drizzle pollenta cake she likes to bake, I thought I'd give that a try.

First of all, those of you that are not gluten intolerant, I don't want you to be put off trying this recipe just because it contains no flour, like a "normal" lemon drizzle cake. This is not a substitute recipe, it isn't missing anything by using gluten free ingredients and it's not a poor relation to the standard way of cake making. In my opinion it is a cake in it's own right and is just as delicious. In fact, I'd go as far as to say that I actually prefer this recipe. It is guaranteed to be moist, has a lovely cakey texture and has, what I like to call, an adult lemony taste to it, by which I mean it is not too sweet or sickly and has a nice sharpness to it.

As I hadn't baked this sort of thing before I had a good look round the Internet and through my library of cook books to come up with the recipe. There was a couple of things on the web that I thought I must give a go to because they sounded like a great idea but I have put my own little twist on it and jiggled around with the quantities until I was happy with the results. I hope you like it too!

Lemon Pollenta Drizzle Cake Recipe: (makes around 12 good slices.)

Equipment:

Springform cake tin approx 9 1/2 inches x 3 inches deep.

Kitchen scales.

Large mixing bowl.

Large saucepan.

Stick blender.

Wooden spoon.

Grease proof paper.

Large measuring jug.

Ingredients: For the Cake.


2 lemons.

140g of butter, softened, plus a little extra for buttering the cake tin.

3 medium eggs.

200g of caster sugar.

50g of palm sugar, jaggery goor, gur shakar or muscovado sugar. (any one of these will give an extra malty treacly taste to the finished cake but if you don't have any use an extra 50g of normal caster sugar.)

150g of ground almonds.

200g of coarse cornmeal ( sometimes called pollenta.)

1 teaspoon of baking powder.

Ingredients for the lemon drizzle:

140g caster sugar.

Juice of 1 lemon.

Method:

Put two lemons in a large saucepan of cold water and bring to the boil.

Drain the water from the lemons, fill the saucepan up again with cold water, bring slowly to a boil, reduce the heat to low and let the lemons simmer gently for about 1 hour, until they are really soft. You may need to top the water up a couple of times.

Once the lemons are ready remove from the saucepan and allow to cool for a few minutes.

You can now turn your oven on to 180 degrees c/ gas mark 4.

Cut the lemons up and remove the seeds, try to be careful not to lose too much of the juice or pulp from the lemons.


Put the boiled lemons in a mixing jug and blitz to a smooth puree with the stick blender.


If you are using one of the specialist sugars then shave it with a knife, or grate it so you don't get big lumps of sugar in the cake.


Put the pureed lemons into a large mixing bowl and add the caster sugar, the specialist sugar, if using, and the butter.

Beat with a wooden spoon until well mixed.


Add the pollenta, the baking powder and the ground almonds to the bowl and mix until all the ingredients are combined.


Crack one egg into the middle of the cake mix and whisk it with a fork, mix it through the cake mix, then repeat with the second egg, then the third until it is a smooth consistency.
 ( mixing them in one at a time in this way will prevent the cake mix from splitting, and its easier than trying to do all three eggs at once.)


Butter the cake tin base and sides then line the bottom with greaseproof paper. ( I find it easier to line the base with a sheet of paper, then clamp on the springform side then trim off the excess paper.


Spoon the cake mix into the lined and buttered springform and bake in the oven for 40 to 50 minutes, until a skewer pushed into the centre comes out clean. The top of the cake will be a lovely dark golden colour.


While the cake is still warm, pierce with a skewer all over so that the drizzle penetrates right into it.

To make the drizzle, simply warm up the sugar until it liquefies and add the lemon juice to it. You will get more juice out of the lemon if you microwave it for 30 seconds on high before you cut it.

Pour the drizzle all over the cake for a lovely shiny glaze.


Let the drizzle soak into the cake for 15 minutes or so and you're ready to slice and serve!
I've served mine up with a good spoonful of  creamy mascarpone.


The finished cake has a really nice tangy mouthwatering lemony taste to it, it's lovely and moist, even before you put the drizzle on it, and the coarse pollenta has a slightly grainy texture which I really like. If you have used one of the specialist sugars then you will also see what I mean about the hint of treacle, it really does add another dimension of flavour to the cake.

Well there you go then blog buddies, This one took a long time to publish as my laptop finally gave up the ghost as I was writing it. Thankfully, I managed to get a replacement this week so I could finish writing it and get it out there to you lovely people.
Things should return back to normal next week, fingers crossed! I am doing the food for a wedding on the Saturday ( 13th September.) but I'm pretty sure I can do my next blog on Sunday and have it ready for you by the middle of next week.

Until next time then,

Happy Cooking!


Mat.